
You can easily enable caching in Joomla using the global configuration options. It comes with a built-in system of caching that can help to speed up the site if it’s necessary. This article will define the type of caching Joomla provides as well as how to enable it in the new Joomla 4.0 interface.
![]() Enjoy high-performance, lightning-fast servers with increased security and maximum up-time with our Secure VPS Hosting!
Enjoy high-performance, lightning-fast servers with increased security and maximum up-time with our Secure VPS Hosting!
![]() Linux VPS
Linux VPS ![]() cPanel or Control Web Panel
cPanel or Control Web Panel ![]() Scalable
Scalable ![]() Website Migration Assistance
Website Migration Assistance
Understanding Joomla Caching
Caching works by providing a preloaded copy of the website that displays quicker because of the shortened load time when a visitor views the website. You can also reference the Joomla documentation for cache settings for more info.
There is one type of caching that is part of the Joomla configuration – file caching. By default, caching is set to one of two settings:
- Conservative caching – allows administrator users to select the modules that will be cached. This option is better for Joomla sites that are frequently updated since you have the ability to remove caching from sections of the site that are often updated.
- Progressive caching – all unique modules are cached; affects all modules and overrides cache settings within each module. This type of caching is better for static sites where content does not often change.
Enabling Caching in Joomla
Caching is not enabled by default and must be enabled through the administrator dashboard. Follow the steps below in order to enable caching in Joomla.
- Log in to the Joomla Administrator Dashboard as an administrator or super user.
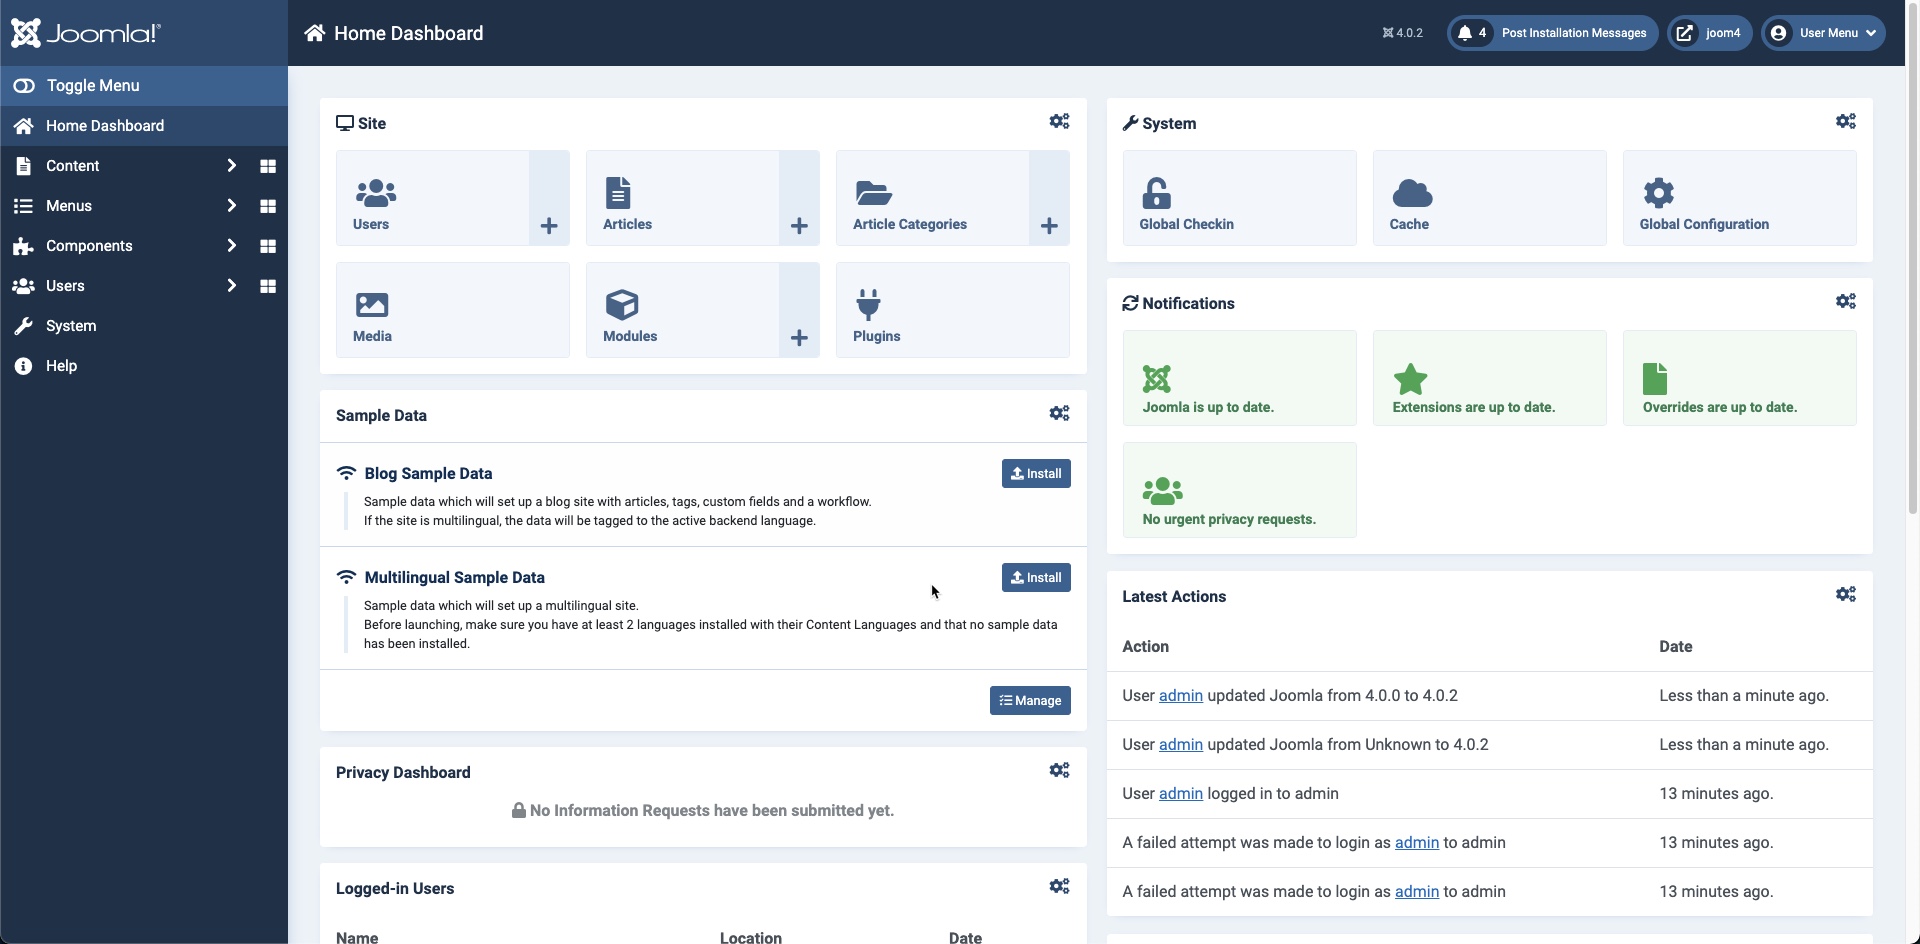
- Click on System in the menu at left.
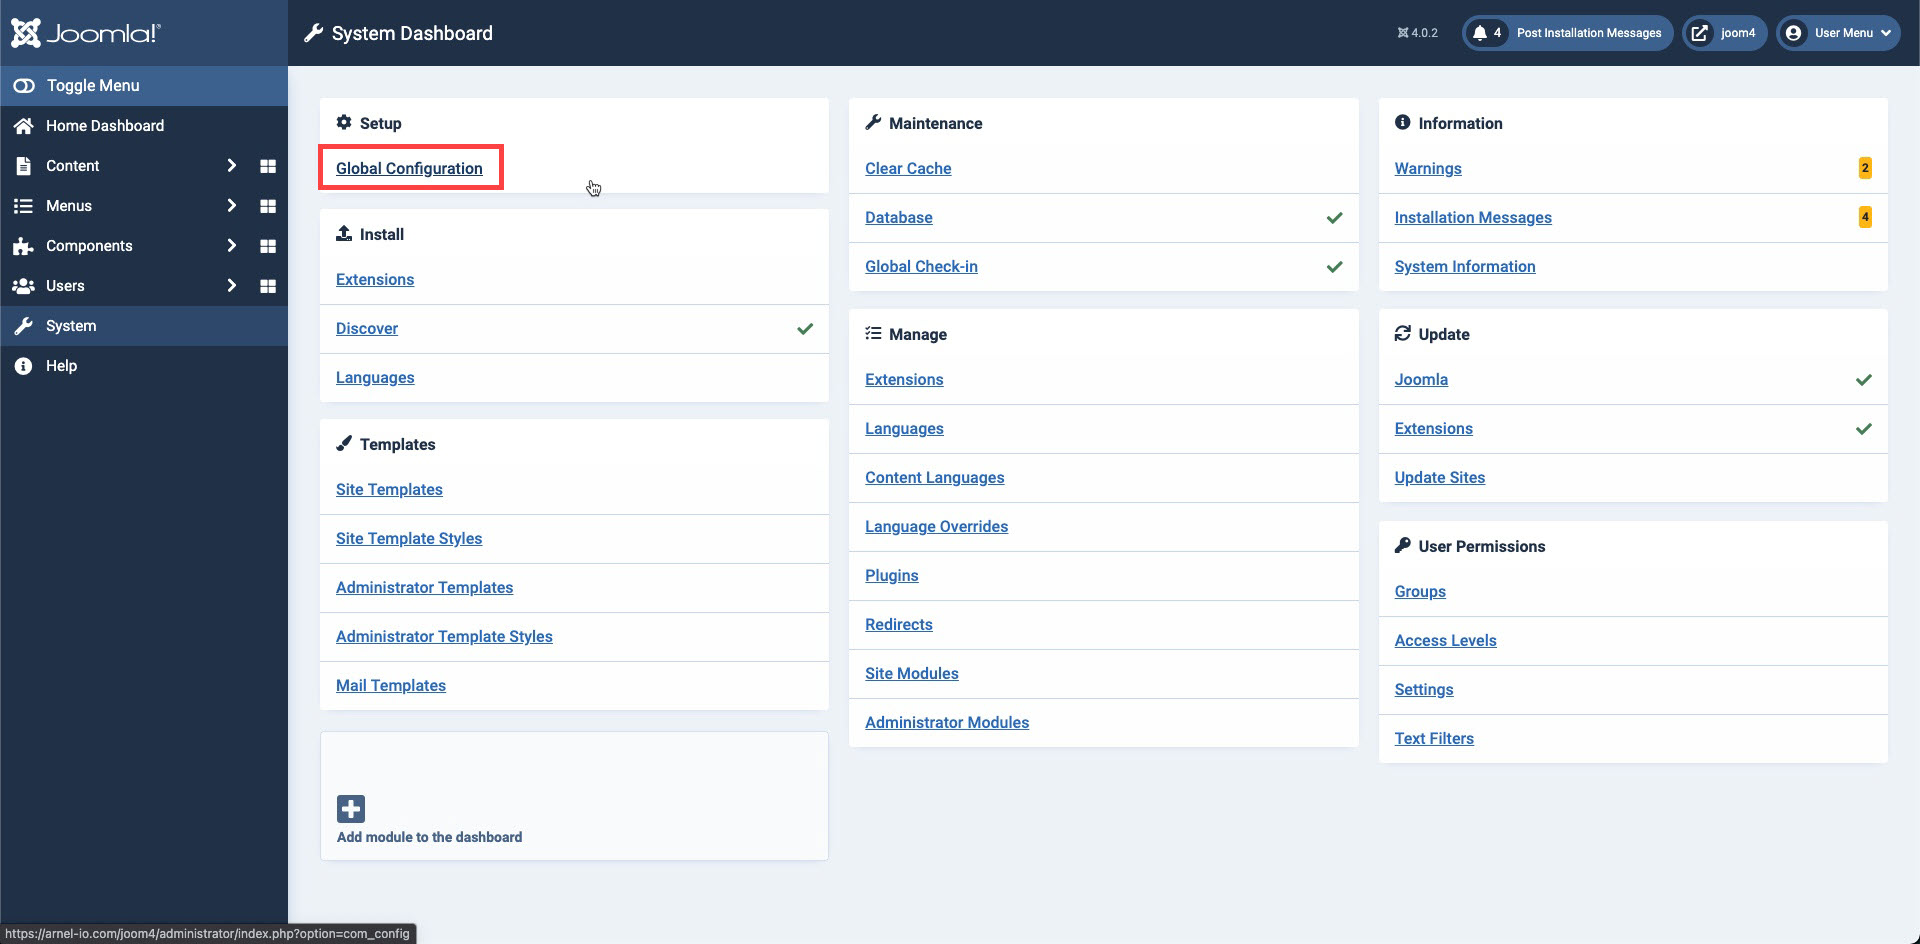
- You will then see the System Dashboard page. Click on Global Configuration in the left corner.
- In the Global Configuration page you should see the System section highlighted and the Cache section immediately below Debug. Click on the drop-down arrow where you see System Cache set to OFF – Caching disabled.
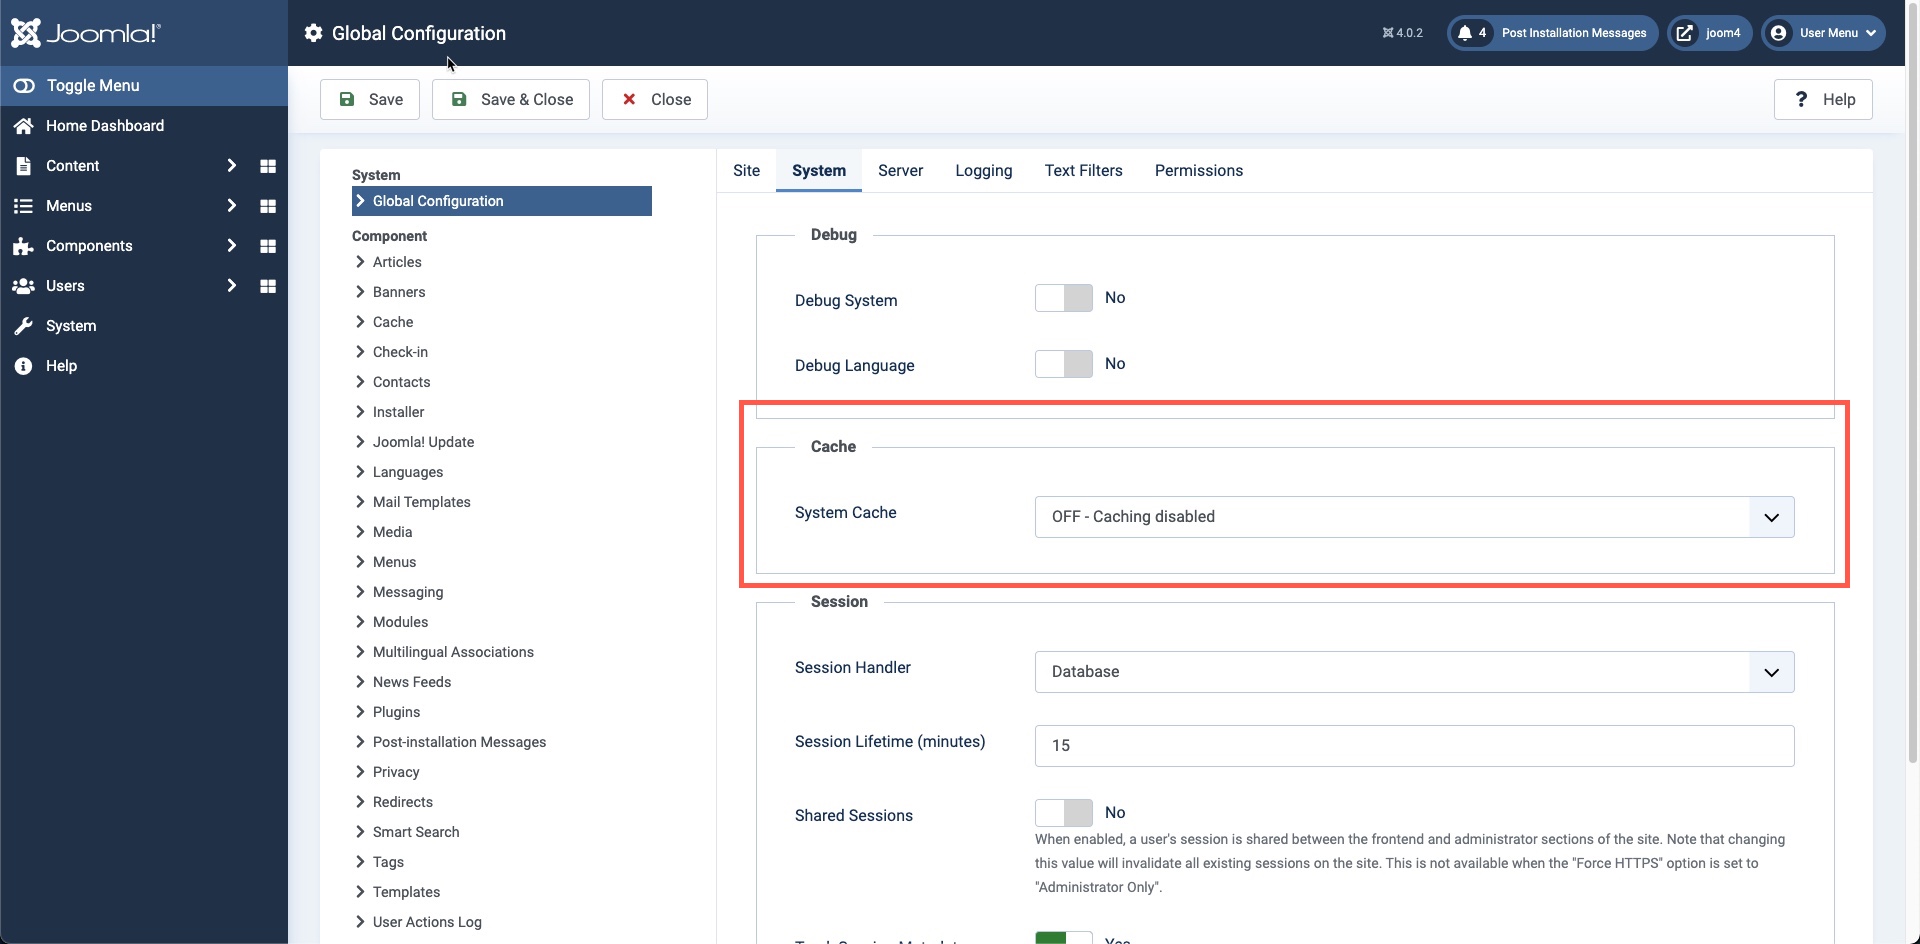
- Here you will get to select the caching you wish to enable: Conservative or Progressive. Note that the caching terms are named for how files are cached and not for the caching type it represents. Conservative caching is best for sites where files are continually being updated. Progressive caching is recommended for static sites where updates do not happen frequently.

- When you have selected the caching type you wish to use, make sure to click on SAVE or SAVE & CLOSE in the top left corner. Otherwise, your changes will not be saved.
That completes our tutorial on enabling the built-in caching within Joomla! 4.0. If you are unsure if you should caching or if you do not know which setting works best for your site, then you should consult with a knowledgeable web developer or web administrator.
For more information using Joomla, please see our InMotion Hosting Support Center website.
Want more performance and power from your website? InMotion Hosting's VPS Hosting plans provide hyperfast site speeds on high-performance NVMe servers.
![]() Dedicated Resources
Dedicated Resources ![]() NVMe SSD Storage
NVMe SSD Storage ![]() High-Availability
High-Availability ![]() Ironclad Security
Ironclad Security ![]() Premium Support
Premium Support